Mystic Bubbles
Click Image for a more detailed View

TOU:
This tutorial was written by me and the graphic is of my own imagination, except the ownership of copyright over
Lil Orora Fae by ©Joel Adams.
If it resemebles any other tutorial it is not intentional and is strictly coincidental.
You are welcome to use my tutorial for Weekly Challenges, but you must link back to Jelly Bean Lane and the tutorial address and not copy and paste it to your message boards.
You may use my supplies for other PSP tags and tuts, but may not claim them as your own and must give credit if you use them in tutorials , linking back to Jelly Bean Lane.
For This Tutorial you will need :
PSP X

Plugins:
Eye Candy 4000
Filter Attacks
One Tube of your Choice, I have used
©Joel Adams Lil Orora Fae
which you may purchase at www.lilz.net with your C.I.L.M. License,
and
My Supplies, which you may down load
here by clicking the zip file.( Lil Orora Fae is not included )

This tutorial is for Intermediate PSPer's, where as you will need to be familur with plugins and Masks to do this tutorial properly. So before you begin, be sure to unzip my supplies and add them in the appropriate PSP Files on your pc.
Ready? Let's Begin by
1. Opening a New image in your PSP
500 x 500 pixels with your background transparency checked.
2. Flood fill this layer with white. Your flood fill button is the little paint can to the left and you select your flood color with the forground color on your color pallet, which is the top color, not the bottom. :)
3. Add a new Raster Layer.
4. Flood fill Raster Layer 2 with Gradient Duotone Red ( standard with PSPX).
5. Now it's time to use that really cool Plugin, Filter Attacks. Go to Effects>Plugins>Fliter Attacks>Pattern:Supernova.
6. Go to Layers > Load/Save Mask> Load Mask from Disk > Select JellyBeanGrungeMask with the following settings checked:
Source Luminace
Fit to Canvas
Invert Transparency
Hide All mask
7. Time to add just a hint of a glow around your mask. Make sure you are on your Colored Mask Layer and not the black and white layer and go to :
effects>plugins>eyecandy4000>gradient glow and put in these settings
Glow width = 3.00
Soft Corners =25
Over all Opacity = 60
Draw only outside Checked
Color Opacity 100
Color #ffc0c0
(( HELPFUL HINT: Save as a PSPImage often as you work in case the brownies take over your PSP and it shuts down suddenly. This will save you ALOT of headache and Swearing ))
8. Add a new Raster Layer then tube the heart pearls tube at scaled 136% and adjust it to the center of the Mask. Then go to Effects> 3D effects> Drop Shadow
with these settings:
Verticle 1
Horizontal 1
Opacity 80
Blur 5.00
Color Black or #000000
9. Add a New Raster Layer and select your bubble tubes. Be creative and put them where you want, you may want to add a new Raster Layer between each bubble so you can adjust one if you need to without making all of your bubbles move at once.
10. Time to add a glow around your bubbles. If you added a Raster Layer between each bubble you will need to go to each individual Layer to add the glow effect. To add the glow to the bubbles go to Effects>Plugins> Eye Candy>Gradient Glow , with the following settings:
Glow Width 11.28
Soft Corners 25
Opacity 60
Draw only outside selection Checked
Color #ffc0c0
11. Add a New Raster Layer and add the tube of your Choice. Then go to Effects>Plugins>Eye Candy>Gradient Glow with the following settings:
Glow Width 36.14
Soft Corners 25
Opacity 60
Draw Only outside Selection Checked
Color: #ffc0c0
12. Add a New Raster Layer then select the Pink Sparkle Tube at 35% Scale and add sparkles here and there to your bubbles.
13. If you have used another artists work, then please find your bottom layer and add their proper copyright at this time.
14. You are now ready to add your Signature to the tag. Go to your Mask layer and add a new raster layer. Select the Faerie Font and in your Color Palette your Foreground Color will be #000000 and your background color will be the gradient duotone red. with the following settings:
Antialias Sharp
Stroke Width 0.5
Create as Vector
15. Type your Signature Now, and size it and adjust it where you want it on your tag.
16. Go to Effects>3D Effects> Inner Bevel with the following settings:
Bevel #2
Width 6
Smooth 7
Depth 3
Ambience 2
Shininess 0
Color White
Angle 315
Intensity 50
Elevation 30
17. Go to Effects>3D Effects> Drop Shadow>Effects>Plugins>Gradient Glow with the same settings you use for the Mask Layer.
18. To finish it off go to Image>Add Border with the following Settings:
Top 1
Bottom 1
Left 1
Right 1
Color #8fob32
GOOD JOB! I would love to see the tags you have created from this tutorial and your many variations.
Rachel Hansen Jelly Bean Lane
2003-2007
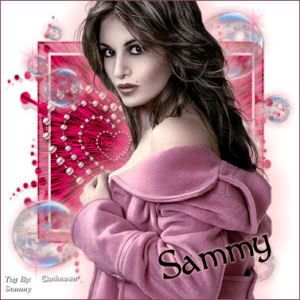
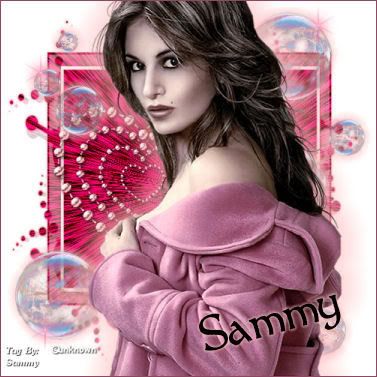
Here is one that my friend Sammy made when she tested this tutorial. I love it and it shows that you can use about any form of art or free tube without using specifically a CILM Artist if you don't have LIC.
Click the Image for a more Detailed View
Liz is a wonderful PSP Tutorial writter, that I had the pleasure of meeting via email yesterday. She contacted me about using some of my graphics in her tutorials. I was very flattered and exstactic and of course I said yes to her, because I LOVE her work and her Tut writing skills!! :) I will list Artists under my PSP Resource Center when they use my work and if I really enjoy what they do, and Liz stole my heart with her Tag LO's. She is linked in the PSP Recources of my page under LizarDesigns. Check her out and tell her I sent you... She is absolutely FABULOUS! Here is a Lovely Tag she made with my "I Heart Chocolate" Papers. Click the image for a closer look. 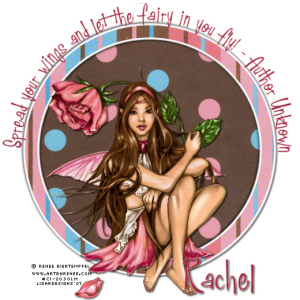 Thank you Liz for the Lovely Tag, I LOVE IT!! Smiles Across the Miles - Rachel
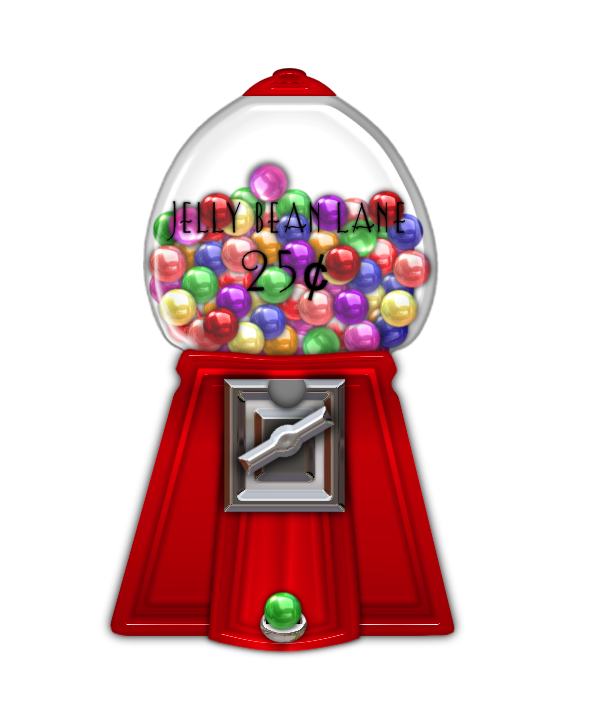
Here's a little something I made today, thought about writing a tutorial for it. :) If there are enough interested people, I may put a couple of color selections of this graphic up for Snags , gumballs seperate and no gumball in the dispencer. :) THis is what it looks like Dolled up. ;) If you're interested, please email me. :) This would be, of course, a freebie. ;) Click the Image for a larger view. 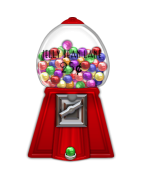
This is the template I put together last night, and here is also the sample of what it looks like completed, of course it varies from paper to paper and element to element, but you can do sooo much with this Template LO. :) This is my son nathan, one of the most recent pictures I've taken and currently my favorite, it really brings out his beautiful smile! :) 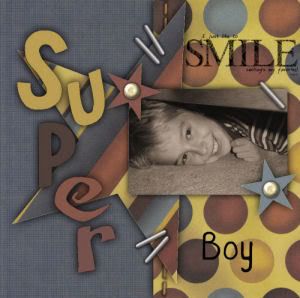 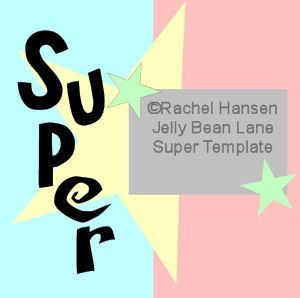 I like to color my template layers so for dramatic effect in advertising them. This template comes in size 1000 x 1000 pixels resolution is 300.00 on PSP. You are downloading a PSPimage file as well as PSD file, compatable with both PSP and PS. ;) 
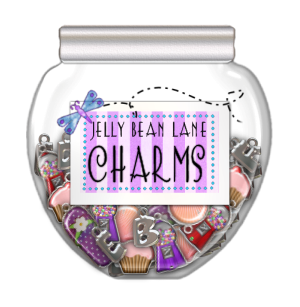
FIRST! I wanna show off my new Scrap Supply Jars. I made these over the weekend, and thought, everyone else does scrap bags, so I am going to be completely differant. I base all of my designs off of inspiration around my home , family and friends, and I keep baby food jars and candle jars and all sorts of paper clips and tacks in these extra jars. My website will have these little jars containing my supplies to download. SO, from now on, when you download my freebies, just click the jar, I am discontinuing the snag it button except for Templates and Paper packs. :) These Scrap Supplies are just "Tacky" ! lol But I think you might like them. I think they will be adorable on a cork board background, ( one I plan on posting later on myself as soon as I make the corkboard. lol) This is a freebie, you won't see on my store and will be a perminant download here and on my PSP Workshop Website. :) Digital Tacks. They aren't extremely large , but are perfect size for even the large 12x12 scrapper and can be resized smaller for Taggers, Tut Makers and the smaller 3 x 3 taggers like me. ;) If this is your first time visiting my blog or downloading my supplies and graphics, I kindly request that you read my TOU. You can read them HERE. This is 100% actual size of the tacks.  Click the Jar to download these supplies Click the Jar to download these supplies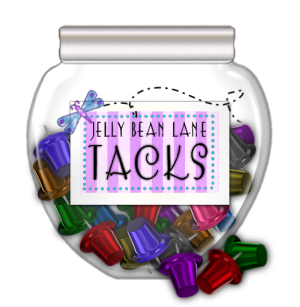 I did get a good nights sleep last night and I am feeling much better today. :) I will be afk for a while today, where as we will be taking the kids to the movies and grabbing a bite to eat. Happy Scrappin' Rachel
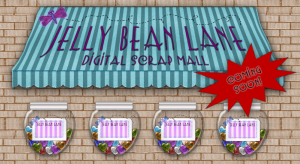 Grand Opening Coming SOON! Keep Posted for the opening of Jelly Bean Lane's Digital Scrap Mall, where you can window shop at all of my kits and caboodles and buy whenever you please. Freebies will always be abundant here no matter what. :) Hugs, Rachel
Hello all... :) I have a couple of wonderful freebies to add firs thing tomorrow. I haven't been feeling the best today. For new readers and friends that are still getting to know me, I have a heart condition a) Mitro Valve Prolaspe and b) Sinus Tacticardia. Usually I feel pretty good as long as I get plenty of rest, a decent diet and my medication on time, but I think with all of the recent stress it kinda threw me off. So I have been really tired the last couple of days and today it settled in pretty darn good. I'm pretty pooped. So, I didn't do much today really but nap off and on and clean the kitchen from the disaster area that occured from making Jam yesterday. lol And I did make a new template to share with you tomorrow. I doodled around a bit and made some graphics of the Scrap Mall and the WorkShop, they look pretty nifty. ;) And I did catch up on emails. :) Not a real productive day, but nontheless, well rested. Tomorrow I will resume my freebie DL's and the goodie bag again. Providing I am not to tuckered out. Off for a good nights rest, Smiles across the miles, Rachel A Sneak Preview of Tomorrows Freebie Template:
I recieved a wonderful email today from Liz, who requested permission to use my graphics in her tutorials. I want to let all Tutorial writers and Siggy Designers know, that your emails are welcomed and I will reply to each. I am honored to recieve them and reply to them, and I do have TOU written for how you are permitted to use my graphics in your tutorial writing... I kindly request, that if you have a differant need than what my TOU outlines, that you do as Liz has done and email me first so we can work something out. Once I hear back from Liz, I will be posting a link for her site if she doesn't mind, because this girl has some great work and some Amazing tutorials. So, PSP'RS....... Keep posted. ;) Hugs, Rachel
Just a quick post that I have closed the May Scrap LO Contest and will be looking over the applications today. I had a few entries this time, and I realize it was just so late in the month to post it.... But... you can begin designing your LO for June, and you can use ANYTHING you downloade my blog, wether its my freebies, Fonts and brushes from my goodie bag or a purchased kit or graphic. This months stipulation is a little differant, you can only use MY graphics and Papers and no one elses, since this month I will be supplying more papers ... lol *grins* I also want to extend this Contest to my PSPers as well. :) So, best Scrappy Tag Layout or Scrap LO.... In other words, you don't have to use pictures of your family, but can use pictures of something else, as long as it's legal with the copyright infringment laws. ;) I will post more later on this months contest and will post publications later on the winner of May's Contest and show off all of the entries. ;) Hugs, Rachel
Every year I make Jam to have on our shelves for the year AND to give as sweet homemade gifts for my friends. This year I made Strawberry Pineapple, but I have more friends now that are diabetic or like me and my family watching our diets for our healths sake, so having all of that sugar eleminates so many people from getting my special treat each year. This year I decided to experiment and make a "Sugar-Free" Jam. The Jam has NO ADDED Sugar, only that which is naturally in the fruit and that is it. I was worried that it would be ok, but not great like the other sweet stuff. But, I was shocked, it turned out AWESOME, and the kids loved it too, so, I may in the future just make the Sugar Free stuff. It's really food and alot easier on the Diet and is Diabetic friendly , if your Dr. oks the fruits used. :) Here is my Recipe: 1 package Ball No Sugar Needed Fruit Pectin 4 cup combination Chopped Strawberries and Bananas ( Fresh not frozen, it does make a differance in the set). 1 cup Unsweetened, No sugar added Apple Juice 1 tablespoon butter 2 tablespoons Lime Juice 3 Cup Splenda mash the fruits in your pan over medium heat, but leave chunks, where as jam is suppost to be chunky and pureeing your fruit breaks down the natural pectin, causing the jam not to set properly. Heat to a nice simmer and add the apple juice and Lime Juice. As the fruit and juices simmer on a low boil, wisk in the pectin and continue stiring and cooking on a low rolling boil until the mixture thickens a bit. Slowly wisk in the Splenda a little at a time to prevent lumps and add the butter to prevent foaming and over boiling. Cook the mixture on a low rolling boil until it becomes a nice thick rich texture about 10 minutes. Remove it from the heat and ladel the fruit preserve into clean canning jars. This recipe made 4 8 oz. ball canning jars for me. Allow it to set until firm and cover with parafin wax, making sure all of the fruit is covered properly. Watch for wax shrinkage and top with more wax as needed to insure that the preseves are completely covered leaving none of the fruit explosed. Cover with the lid and some pretty cloth and a piece of twine with a tag and a bow with a little quote or poem to give to friends and family. ;) Hugs. Rachel
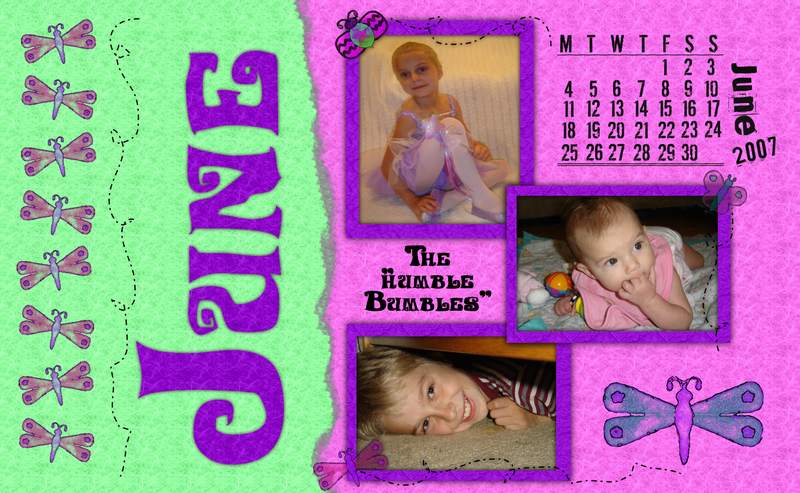
While there has been so much going on here the last couple of days, I have had little time to get on and just work on something new. :( Today, being the first of the month however, I did find enough time to design this months calander, and I used the "humble bumbles" I already have created and put together a cute little Quick Page for your Desk top. It looks best stretched, and was made to fit my own screen being a flat wide screen. I do hope you will enjoy it. Here is a Sample of what it looks like with my kiddos pictures in it. :) CLick the image for a closer more detailed view. 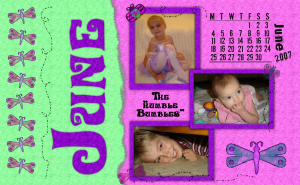 Want it? Want it?
|


